Hugo
Hugo是由Go语言实现的静态网站生成器。简单、易用、高效、易扩展、快速部署。
Hugo的下载和安装
Hugo安装不需要安装Go环境
下载
在Hugo的中文文档中提供四个安装平台的教程,有Mac OS、Linux、Windows、BSD衍生平台,本文在此主要介绍Windows的下载和安装。
二进制安装
打开Hugo-Releases的页面,对于Windows系统来说,Hugo提供了zip包、choco、scoop等安装方式,在此,我们选择hugo_extended_0.113.0_windows-amd64.zip的zip包。
根据英文文档提示,我们需要将Hugo加入Path环境,解压hugo_extended_0.113.0_windows-amd64.zip,我们会得到hugo、licese、READEME三个文件,将解压的三个文件放到任意文件夹中,D:\code\program,然后编辑系统变量,将D:\code\program加入Path中。
测试
1 | C:\Users\xxxxx>hugo version |
出现以上,就表示Hugo已经安装配置完毕。
建立网站框架
生成站点
win + R输入cmd,打开控制台窗口,cd D:\code中,输入
1 | > hugo new site hugo |
成功会显示
1 | Congratulations! Your new Hugo site is created in D:\code\hugo. |
选择、配置theme
由于新建Hugo网站默认没有布局和模板文件,所以我们可以到Hugo的主题市场去选择喜欢的主题,但是不同的主题架构,底层不同,会导致加载速度很慢,选择主题需要谨慎。
Meme主题
Meme是一个强大且可高度定制的GoHugo博客主题,专为个人博客设计。MemE主题专注于优雅、简约、现代,以及代码的正确性。MemE 主题对习惯了 Hexo 的用户非常友好,是从 Hexo 迁移到 Hugo 的不错选择。
安装
特别注意Meme主题需要安装扩展版(extended)的 Hugo
进入D:\code\hugo在此文件夹下,右键点击Git Bash Here,输入以下代码:
1 | ~ $ cd blog |
尽量使用 Meme 官方文档的安装方式,利于以后的更新
1 | ~ $ cd blog |
开始
更换站点配置文件
打开D:\code\hugo\themes\meme\config-examples\zh-cn复制config.toml中的内容;
打开根目录下hugo.toml替换其中内容。
新建文章
进入D:\code\hugo在此文件夹下,右键点击Git Bash Here,输入以下代码:
1 | ~/blog $ hugo new "posts/hello-world.md" |
创建第一篇文章和关于页面
1 | ~/blog $ hugo new "posts/hello-world.md" |
本地Hugo测试
依然是打开Git Bash Here
1 | ~/blog $ hugo server -D |
访问http://localhost:1313/ ,就成功在本地搭建好博客
Hugo上传Github
创建Github仓库
进入Github,在右上角+号选择new repository,然后Create repository
打开Github Desktop
点击file,选择clone a repository选择URL,第一个空填创建的Github地址,Local Path填任意一个空的文件夹即可,然后clone
上传本地代码
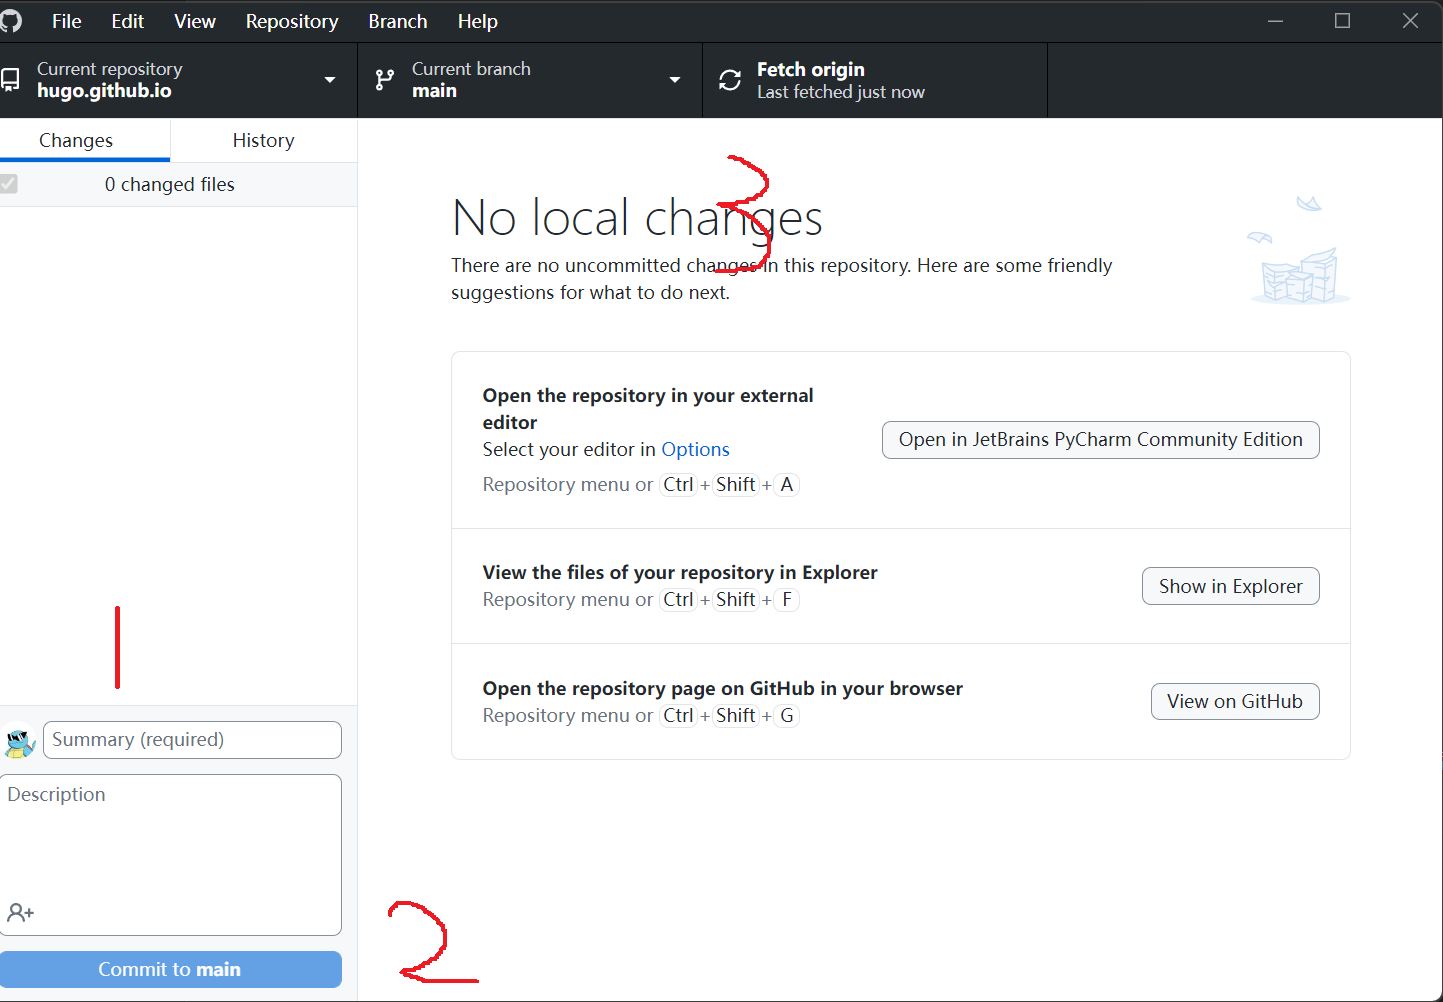
将改好的Hugo文件夹下的文件,复制到clone到本地的文件夹下,点开Github Desktop
1:选择comment的理由
2:comment
3:上传
然后刷新Github仓库就能看到,上传的文件了
部署到Vercel上
Vercel
Vercel是一个开箱即用的网站托管服务,通过它我们可以获得:一个非常简单的博客搭建过程、一个静态博客自动部署服务、还不错的网页国内访问加速,同时它还允许你将博客的源代码仓库设为私密。
部署
点击Vercel页面,点击Add new project,在出来的页面选择刚才上传的Github仓库,在出来的页面中Framework Preset选择Hugo,
点击Build and Output Settings:
Build Command填hugoOutput Directory填public
点击Environment Variables:
- 在
cmd中输入hugo version,查看hugo版本 name填HUGO_VERSIONvalue填你安装的hugo版本,例如:0.113.0
点击Deploy发布
添加域名
打开settings中的Domains,输入自己购买的域名,然后Add